I have been staring at a pile of lumber down in the wood-fired coffeemaker area in front of the house for the better part of 5-months now. So, with the arrival of cooler weather this week (high of 87 Saturday) I decided to get the first couple of hours in on the deck.
Planning Things to Death
Since this is a project that has had a lot of gestation time living inside the “a/c bubble” this summer, a fair bit of time was spent watching how Amish communities do “barn raisings” and after watching some YouTube videos, I began to suffer the illusion of thinking “Why, I can do some of that kind of work!” (No, not really, the details on that as out story unfolds.)
The main feature of solid Amish work is their dependence on the material rather than get addicted to “Englisher” ideas. Like metal fasteners and new-fangled machines. As my fever would up, I had some insights into “a blended build.” Which (in theory) could be a bit of Amish this, and bit of high tech that.
The main difference in my deck would be:
- The use of ground screws for the post foundations.
- Notching the posts so that no metal joiners would be needed to secure beams to the uprights.
Also, being a tool slut, I was determined to use that nifty little Black and Decker Power Hand saw that has been hung on the side of the workbench gathering dust.
There’s a funny story here: Trying to put the blade in. After agonizing over it for 10-minutes, or so, I realized that the fastest way to get to a conclusion would be to jump in the office and turn on YT and find a video.

I had used the saw a few times, but like so many tools in the shop, there are just so many little tweaks and kinks to remember, a fast internet connection may be all that ensures the continuation of life on Earth.
Time and Tools
Another key a/c bubble insight was that on too many of my projects, time has been wasted by the armload simply shagging tools. It’s only 150-feet, or so, from where the deck was going in. But that’s 300-feet per forgotten item. I was planning to do better.
I have fond memories from being 18 and a journeyman R&E mechanic at “Hughes Air Wurst”. When I was on a crew that was pulling a D-check on an F-27, for example, you’d go to the tool room and give them your “chit.” In return, they would have you the tool that the IAM mechanics were not required to keep in their kit. Things like a megger – a fancy high voltage ohm meter to test insulation values on wiring harnesses.
Heavy checks in the aircraft industry are a real joy to work. Because there is a procedure for everything. Every screw and nut has a torque setting and usually a safety wire (castellated) nut involved. I can still “spin safety wire” with the best of ’em.
Anyway, this and doing a lot of the work on our own Beechcraft (at Chad Moser’s shop in the Georgia mountains) got me looking forward to the “prepping for a job” as much as doing the job well itself. See, Chad had things like a “pain cart” and an “air tool cart” (and a wiring cart, of course) because it allows a very complex set of shop operations to develop naturally with no time wasted on tool-hunting.
There are exceptions to “tool cart” theory. For example, the sand blasting cabinet was a fixed location in the shop in order to have high-pressure air and big capacity air handy.
As a result of working in these kinds of settings, I’ve got my own shop set up as a kind of “halfway house” spin. I mentioned a year, or so, back about how those fat-wheeled beech wagons are great for big yard and farm projects? Mine is still used with great regularity. I simply walk to each of the “tool areas” in the shop and pull what’s likely to be needed. Starting with that power hand saw.
Walk with me and let’s go pull some deck-building tools!
A Fool and His Tools
To successfully pull tools, you begin by thinking about what you will be needing (and roughly in order) for the work planned. Remembering our Grand Simplification of all work? Materials, measure, cut, join, and finish makes it a breeze.
First stop is the Measuring Department. This is where rulers, gauges, levels, anything having to do with measuring lives:
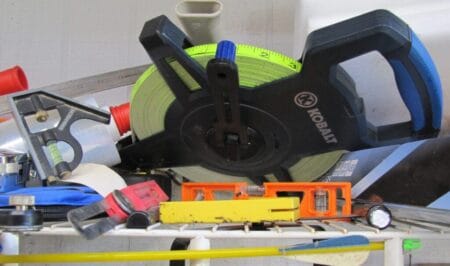
Combination square, long and short levels, and a good measuring tape. If you have some depth in Measuring gear, you will have the luxury of a 16 or 25-foot Fat Max (not the big 40-footer). Allowing you to size the tools to the work.
If we’re going to measure, we will also need to mark in order to cut. This leads to visiting the Shop Pencil and Marker Box:
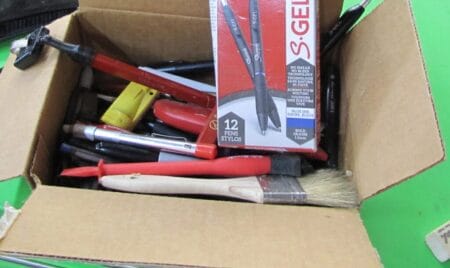
This wasn’t a high precision job. Level to an eighth of an inch (over 8-feet) would be fine. Again, you pick the tool for the job. No point using the self-retracting carpenter pencil (and its odd offset sharpener) when a fat black Sharpie will work better (and be a hell of a lot easier to see) on treated timbers.
Now we think about fasteners. We want something weather resistant, and this means a visit to the Impact Driver section with a sample of our choice from the fastener cart.

A couple of boxes of fasteners goes in the cart, as well. With not one but two impact drivers. A little Skil is light and useful for Philips heads us to an inch and a half, or so. But the big Hitachi with a socket on it for the bolts that will hold uprights into the ground screws.
Outside, the tools are beginning to pile into the beech cart…
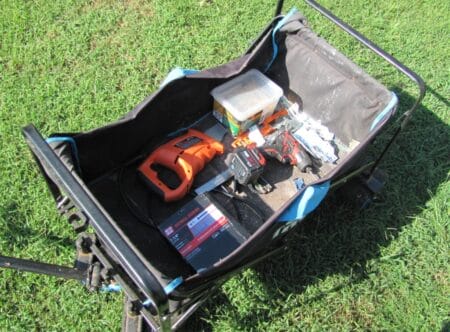
But no matter how orderly you try to be in your thinking, there’s always that “one more thing” I forgot.
Best practice is to spend almost as much time on tool selection (and getting the right goods in the cart) as you think you will actually spend working.
I exaggerate, of course, but – for example – standing outside the shop staring into the cart it dawned on me that I would need to power that hand saw.
“Hmm…what have I overlooked?”
Well, sure as hell, there it was: No way to power the little whizzy. So back into the shop and a visit to the Power Center (the area around where I installed the charge controllers, switching, metering, breakers, and inverter-chargers for the grid interactive solar system.
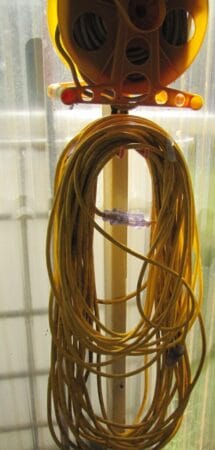
There’s an assortment of extension cords there – some of them heavy duty enough to run a welder 100 feet out (like at the panels). For this job, though, a lighter duty 50-foot cord would work.
Was there something else?
Yes! PPE!
That’s Personal Protective Equipment. Covers the whole range from eyewear to N100 masks to Tyvek suits, to rubber gloves, leather gloves (though the cutting and welding gloves are with the welding helmets closer to that equipment. Here, we also find shop first air kit and more gloves than you can shake a stick at:
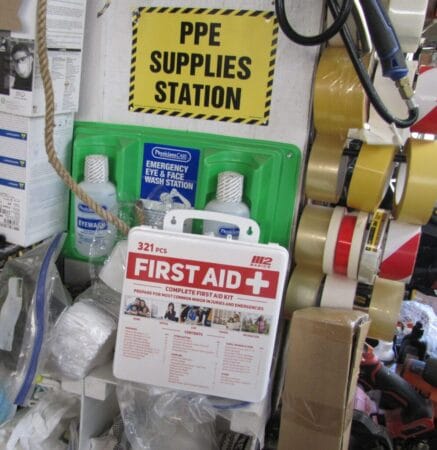
Again, one-more-thing to go into the cart: Several pairs of cheap cotton work gloves. We have no delusions about these keeping every speck of dirt off the hands (they won’t), but it’s a start.
Just two more stops and load out will be done.
Sticks and Sticks
Over in the corner of the shop is a wood pile. Not a very pretty thing. But when you are doing basically one-man work, an assortment of “sticks” is a useful thing to keep handy to really speed up the work. You can brace, hold, and do all manner of clever things with them;

I didn’t need too much: A couple of 3-4 foot pieces an inch and a half by 3/4 thick. Might not be used, but easier to put in now than have to walk back to the shop to fetch later.
Then there was angle metal. These would be used (not going “full Amish” which would involve actual skill) to hold the 2-by-6’s in place and immoveable. There’s a cart call WIP (work in progress) Cart… supplies for upcoming ideas.
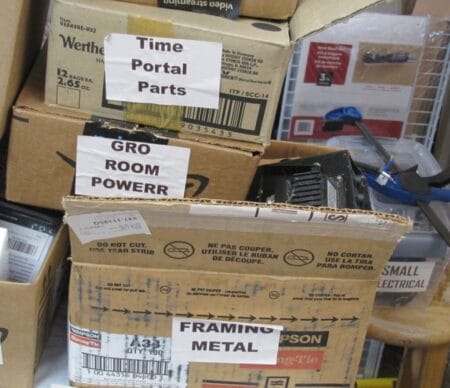
Of course, it would be the “framing metal” that we’d be pawing through:

Son G2 once remarked “You could build a house just with all this shit in your shop, dad…” Well, um, not the whole thing. But there are a couple of chainsaws, a chainsaw mill and some big blades for the bandsaw, so I suppose we could timber and recut some wood if we got ambitious…
To the Joe Site
We will do Part 2 of this (likely next weekend) but two things to point out. On Day One, I was able to get the basic frame and foundation up in 2-1/2 hours because I love ground screws:

Put these bad boys in and you have a buildable foundation in about no time. Seriously, when G2 returns, we will have the meaningful father-son conversation about barndominiums and ground screws with 4X4 posts on ground screws and a concrete pad over. Get the verticals up, put in some notched 2-by-12’s into 4-by-4s under and toss up a few armloads of prefab roof trusses. They come up now and then on Craigslist in the Materials section.
Power Hint
Getting set up for the job, an important fine point of workmanship here: Always keep the fat end spade of your power connector in the wide extension cord hole to preserve grounding/neutral:
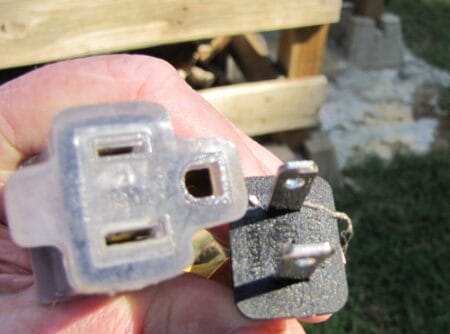
(Yes, I knocked off the piece of grass from the plug before connecting. Not a big deal on a bone-dry day, but any moisture and the electrical inspector would flag the job.
And as long as we’re setting up power for the job, make sure to put a half-turn in the join to keep your cords from coming apart.
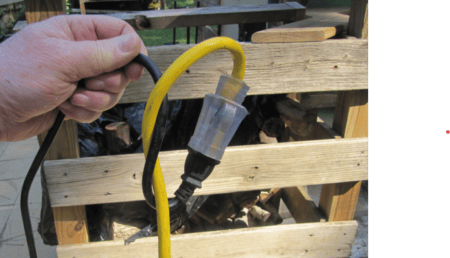
There’s an argument that cords should be allowed to part in the event you trip on them. But let’s not go there. Power going off is always a timewaster on the job.
Final Point: Where’s My Stogie?
My late Dad’s late brother (whole family seems late, lately) was one of the best homebuilders I’ve known. Built beautiful homes when he wasn’t a Seattle Firefighter which was his main gig – always like 10-years before similar designs hit Sunset magazine. Had a real eye for design, detail and perfect workmanship.
Used to have a Dutch Masters cigar when working. A habit I found most agreeable, as well. Now, however, I’ve switched to simply chewing on the end of a Sharpie. They’re harder to keep lit, however.

Still, there’s something about chewing on a stogie (or Sharpie) that seems to sharpen the mind when putting critical eyes on your project as you line up the next steps. When a particularly precise piece of work was to be done, there was a little “mini ritual” where the stub of the cigar came out and was placed in a position of honor. And the ritual closed with the return of the stogie when the job was satisfactorily done.
Kids today – especially those raised chicken-like in small “coops” in the city, have no idea the joys of doing high-quality construction around the home. Industrial arts have been mainly “lawyered out” of education.
While banging and sawing a way on projects like this, I wonder how long it will be before America is humbled (as we were in the Great Depression) when people had to “go local or go hungry”? Fears about war in Asia before month-end linger. Preparations continue.
We want to be able to watch the miserable proceedings from the deck.
Write when you get rich,
Read the full article here


