If you own a Glock—or four, or ten—you’re not alone. It’s almost like a rite of passage to have at least one “plastic fantastic” gun that’s actually a Glock rather than a Glock-off (yes, I said it). And if you own a Glock, you might have heard that they never need to be taken apart. After all, they’re made to run dirty, so just lube and move on. It is true that lube tends to be more important than cleaning your Glock. However, if you want to swap out parts, inspect for wear, or maybe you do want a clean gun, you need to know how to take it apart and clean it every now and again. I’m going to walk you through taking a Glock apart all the way down to the bare bones.

What tools do you need to disassemble a Glock?
You don’t need a wide array of tools to disassemble your Glock. There are Glock tools specifically made for taking these guns apart. They’re affordable, simple, and easy to use. But if you prefer to use tools other than a Glock-specific multitool, here’s what we suggest:
- 3/32 punch
- Gunsmith hammer (one end brass and the other, some kind of polymer)
- Flathead screwdriver
- Armorer’s block or vise
- Gunsmith tray
We’re not getting into cleaning, but if you’re going to clean, consider a good bore brush for the barrel, some patches, a cleaning brush or toothbrush, and some Q-Tips. Add those things to your preferred cleaner and lube, and you’re good to go once the gun is disassembled.
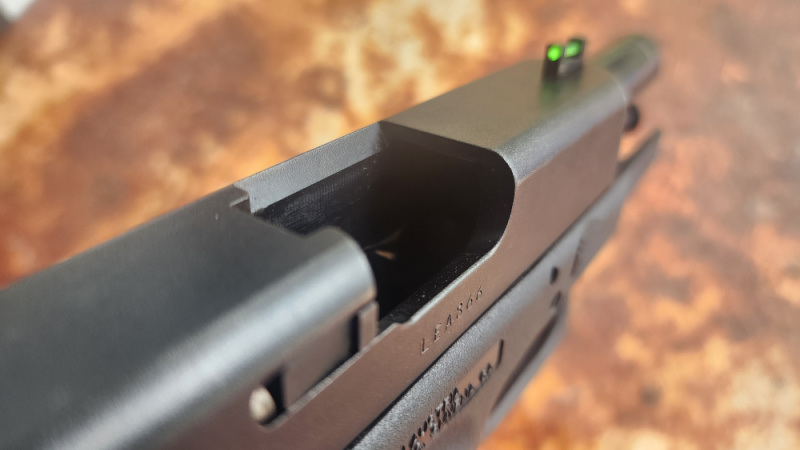

Step One: Clear Your Glock
It doesn’t matter if you’re swapping out iron sights, cleaning your gun, or looking for worn-out components. You need to respect the four golden rules of gun safety. That includes clearing the gun with visual and tactile inspection. That chamber isn’t empty until the magazine is dropped, and you’ve both seen and touched an empty chamber. Even then, take care to keep the gun aimed in a safe direction. It doesn’t matter if you’ve touched an empty gun—always follow the rules of safety.
When your Glock is confirmed empty, it’s time to move on to the actual disassembly. It’s up to you whether you do this sitting at a table, or put the gun on a block, or in a vise.
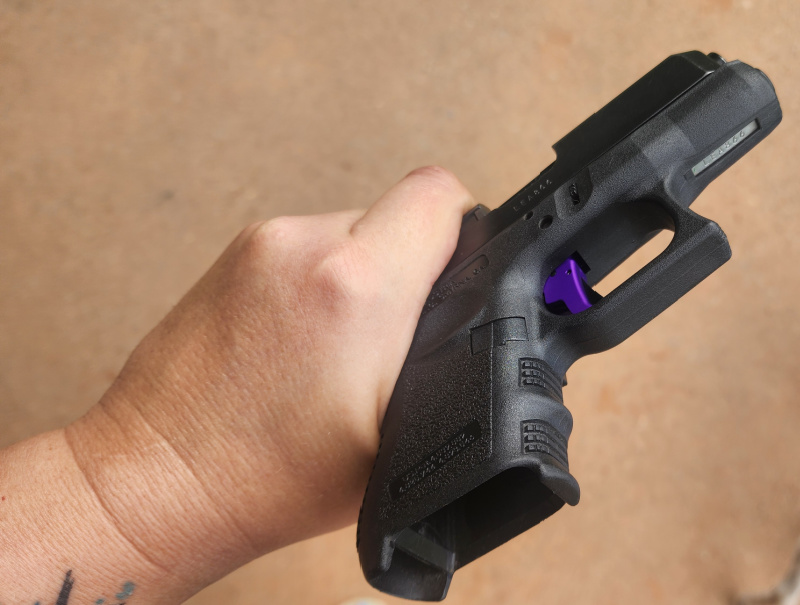

Step Two: Remove the Slide
The first step in removing the slide from your Glock pistol is to pull the trigger. That might feel counterintuitive to gun safety, but that’s why you’ve taken care to properly clear it and continue to aim in a safe direction. Next, grip the gun in one hand and move the slide rearward about one-half inch. I accomplish this by holding the gun upside down in my left hand, with the beavertail portion of the grip pushed into the thenar spaced of my hand. That’s the skin between the thumb and index finger. I then use my four fingers wrapped around the slide to manipulate it (see image).
If you move the slide back too far, you won’t be able to activate the mechanism that allows you to take it off because the trigger will reset and need to be pulled again.
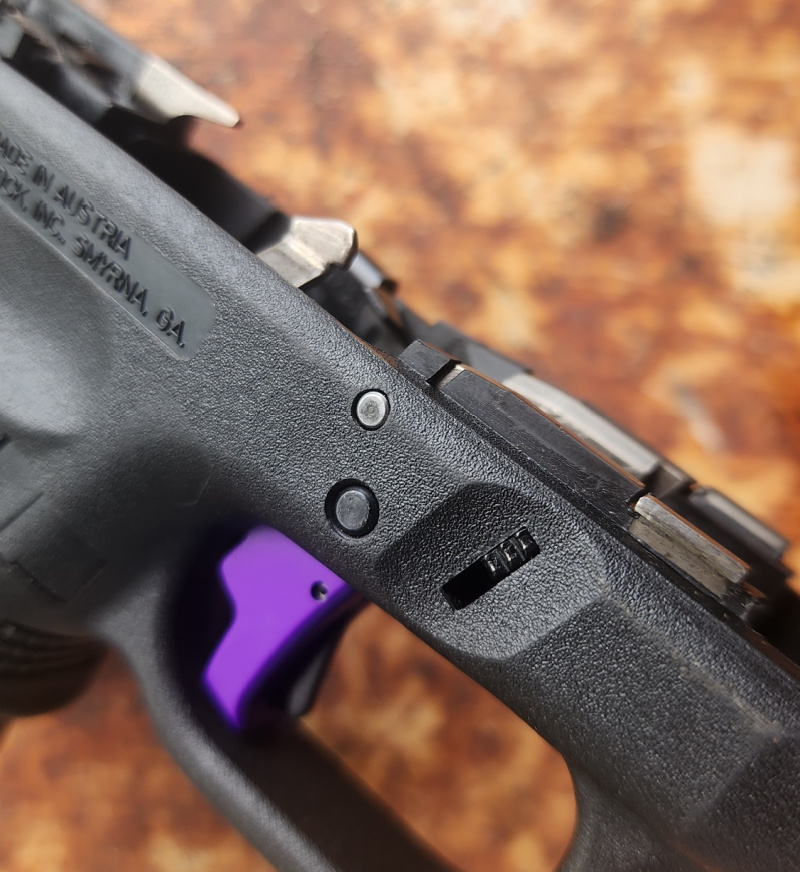

Side note: The slide locks shouldn’t be confused with the slide stop lever. They are located on either side of the frame, above the trigger guard, but slightly ahead of the trigger itself (see image above).
If you’ve pulled the trigger before manipulating the slide, you should find it simple to hold the gun in one hand while pulling the slide locks toward the bottom of the gun simultaneously. It sounds tough, but when done properly, the locks move down smoothly, and the slide will shift forward so it can be quickly removed. I use my right hand thumb and index finger to pull the slide locks downward simultaneously.
Once they’re moved down, I use the thumb of my left hand to push the slide forward for removal. The locking levers must be held down as you push the slide forward to take it off. There are different ways to manage this, so if you need to grip it differently, that’s fine.
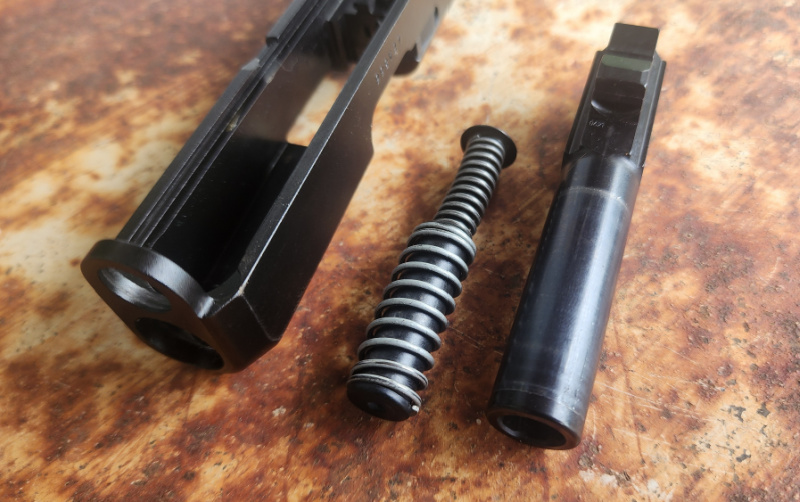

Step Three: Disassemble the Slide’s Basic Parts
If you’re just doing basic cleaning or inspection, you can stop your disassembly by taking the slide apart. That can be done with your bare hands; no tools are needed. Just remove the spring, pull out the barrel, and you’re done. Those two pieces can be removed by looking at the slide and seeing how they fit into it.
Taking the slide apart in significant detail requires a far greater number of steps and isn’t recommended for basic cleaning or general inspection of parts. It also isn’t recommended unless you’re more than passingly familiar with Glocks because accidents and broken parts happen. For our purposes, we’re sticking with the removal of the major parts.
Set aside the spring and barrel alongside the slide.

Step Four: Remove the Pins
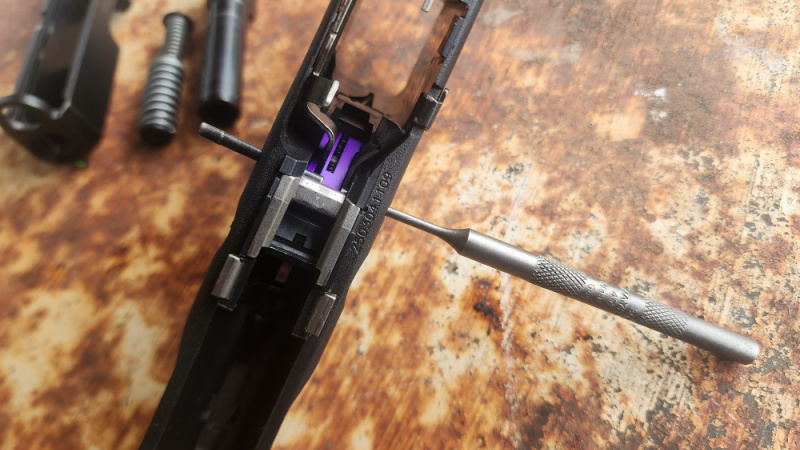
Now, we are going to get into removing the three pins holding the action together because you’re a lot more likely to need to take those out in order to replace a trigger or locking block. They’re also simpler parts that are straightforward to tap and easy enough to replace. All three pins should be removed from left to right and replaced right to left.
First, you’ll remove the locking block pin, which is the topmost pin located above the trigger guard. Next up is the trigger pin, which is immediately below the locking block pin. The trigger pin has grooves in it that can make it more challenging to tap free, so take your time. If it gets stuck, manipulating the slide stop can help it work loose.
With the first two pins out, you can easily remove the slide stop, spring, and locking block. To get the locking block out, you might need to use a flathead screwdriver or the 3/32 punch to lever it upward, out of the frame. Set those parts aside along with the first two pins.
Finally, remove the third pin. This is the trigger housing pin located at the top of the gun’s grip. It’s important to be aware that this is a plastic pin that can be easily broken, so don’t get rough with it. Tap it out carefully.
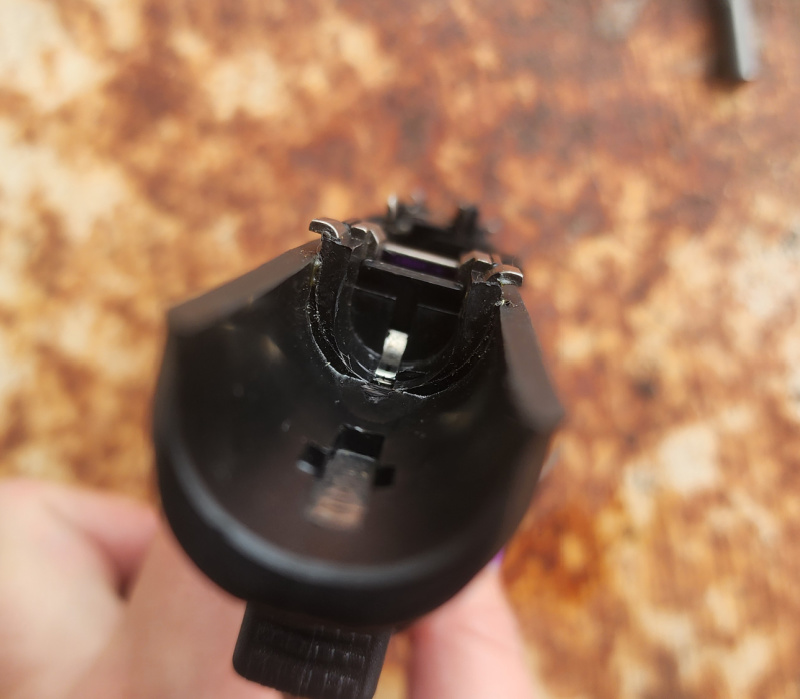

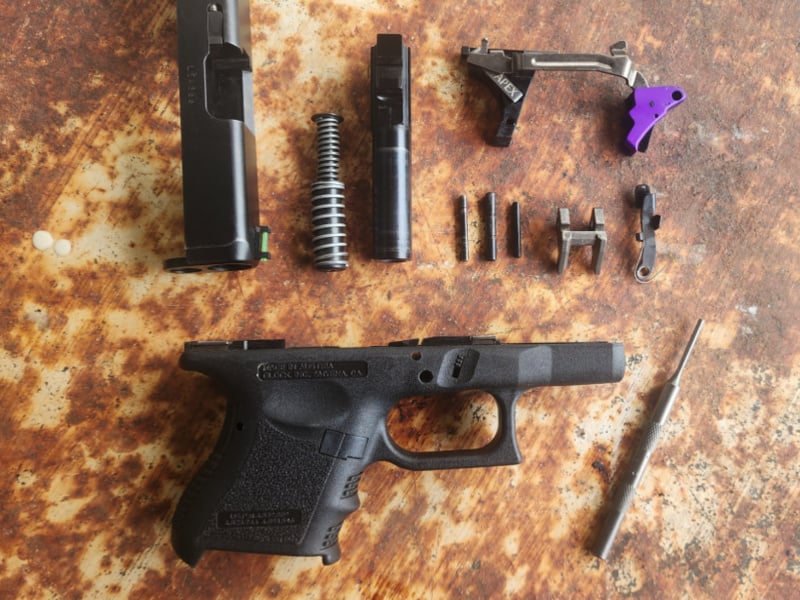
With all three pins removed, you can take out the trigger group. Your frame is now empty. Note that when it’s time to put your Glock back together, you reverse the steps. There won’t be any need to manipulate the locking lever for assembly, though. Just move the slide over what looks like metal ears at the muzzle end of the frame. Move the slide back and keep it going past the back of the frame just like you’re racking it. This will put it back in place for use.
Now that Your Glock is Apart
At this point, you can either thoroughly clean your Glock or replace whatever parts you need to access. As you work, watch for signs of stress and excessive wear on parts. Although Glocks last for quite a while, and you’re not likely to wear it out, it’s certainly possible to eventually need to replace a part. It’s always a good idea to take excellent care of our firearms, whether they’re used for self-defense, hunting, or fun on the range.
Read the full article here

![Best 10mm 1911 Pistols [Field Tested] Best 10mm 1911 Pistols [Field Tested]](https://gundayfunday.com/wp-content/uploads/2024/12/10mm-1911-feature-colt-delta-elite-390x220.jpg)
![G9 Defense New 9mm 126-Grain Copper Subsonic Ammunition [FIRST LOOK] G9 Defense New 9mm 126-Grain Copper Subsonic Ammunition [FIRST LOOK]](https://gundayfunday.com/wp-content/uploads/2024/12/9mm-Sub3-390x220.png)